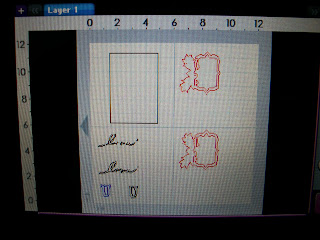
Using my Gypsy, I began with a 3.75x4.75 rectangle (George) for the background layer. I added a Storybook frame - 2x3- and welded the leaf flourish - 2.29x2.36 then copied the image. On the screen shot, you'll see "love" from Beyond Birthdays. When I cut everything, I felt it was too fine, so I switched to "Love" and its shadow from Home Accents (a little creative license here), cutting them at 3.22x2.64 and 3.22x2.76 respectively. I don't actually enter those odd sizes on my Gypsy screen. I just add the image and then increase or decrease the size (a simple tap of the button) until it fits my design - that's the beauty of a Gypsy - you can make any size that works for your design. The "U" and its shadow are both 1" from Storybook.
Here's the paper on the mat. You won't see the paisley on the card. I actually decided to turn it over and use the backside. It looked better on the 4x5.25 background piece that I cut with my papercutter.
All the pieces ready to assemble. Notice the Home Accents "Love"? It just worked better. I also cut an extra green frame so that I could pop the leaf flourishes after cutting the frame away.
A little inking on the card base, background, and leaves using VersaMagic chalk inks - love them!!!!
I used my Zig pen to assemble the pieces. I often use Xyron, but I stuck (he-he) with Zig and my ATG 714 for this project. I decided to adhere the sentiment to the leaves first so I could use foam dots when placing that piece on the card to add dimension.
A few Kaiser Craft pearls to dress things up.
Adhere the assembled card to a folded 8.5x5.5 card base and you have the finished product. This card was so simple that I'm sure a tutorial wasn't necessary, but it was a great learning experience for me. I'm not sure what's on the design screen for tomorrow. I have quite a few cards to complete and there's always Raq's card challenge that's posted every Wednesday.
Thanks for visiting. If you have time, please leave a comment or sign up as a follower. Your support is so appreciated.
Hugs, and Happy Crafting!!!!


Larelyn, this is a beautiful card. Great job. Love your work.
ReplyDelete