A place to share my papercrafting designs and encourage others to join in the journey.
Friday, October 30, 2015
Sweets for My Sweet
Tuesday, October 27, 2015
Clear it Out challenge #97
The Sugar Skull is not actually a Halloween image but rather one used during the celebration of
Dia de Los Muertos which joyfully honors the dead. To that end, I wanted to keep my design truer to that tradition rather than the Halloween colors and embellishments.
I used Spectrum Aquas to color the image and then covered it entirely with clear Wink of Stella.
The mat is the large Spellbinders Fleur de Lis die. I used a gold Pilot Paint Marker to draw the borders on the card base and image mat and then added a prima flower.
You can join in this challenge by linking up to the Clear it Out challenge blog.
The sponsor for this challenge is

Monday, October 26, 2015
Pumpkin, Pumpkin
Hi Crafty Friends,
Today is my day at Paper Crafting World.
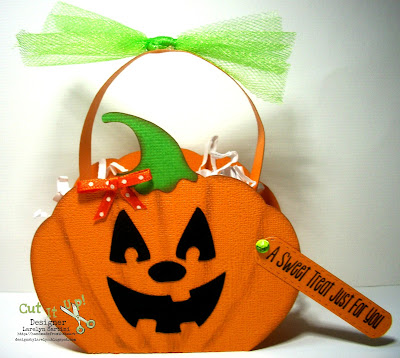
Today I've used the Pumpkin cut file to create two shape cards.
I imported the file into my Silhouette software and then created an offset which I duplicated and then welded together to create the card base. I added face features from a Silhouette file to create the Jack O'Lantern and a flag with leaves and a sentiment for the fall pumpkin. A little doodling on both and these quick and easy cards are ready to send.
You could cut the pieces and let your youngsters create fun cards for friends and family members.
Don't forget our October Challenge. You have this week left to enter.

Just link your project (using a PCW product) HERE.
Wednesday, October 21, 2015
Sending Warm Winter Wishes
I colored with Copic markers adding Frosted Lace Stickles for the snow and fur on the hat. I created the rooftop using Jaded Blossom's Border dies and Winter dies. The patterned paper is from Doodlebug Designs as are the sequins. I also added Frosted Lace Stickles to the rooftop and puffy embossing powder (heat set) to the icicles.
You can join our challenge HERE or by clicking the button on my sidebar. This challenge will be open for THREE weeks since there's an extra Thursday in October.
Looking forward to seeing your project!!!
Pirate Booty
It's my turn to post for Digi My World.
I've made this cute little treat bag using Ahoy Pirates (William). He comes in a set with lots of images to choose from.
I fussy cut the image after coloring him with Copic markers and put him on the Ticket Book die from Jaded Blossom. I used a sentiment from JB's Pirate Booty set and heat embossed it onto a label from the Labels Die set. The papers are from an older DCWV stack called All About Boys. After inking the patterned paper, I added some twine and a brad. I stapled everything to a treat bag filled with "pirate booty."
Monday, October 19, 2015
Fall Blessings
Today I'm sharing a project for the Paper Crafting World design team blog.
I've used the Bear n Pumpkin Patch file which comes colored and in line art.
I imported the colored version into my Silhouette, traced it and added an offset. Then I did a print and cut. I stamped the sign board with a stamp from My Creative Time and added some highlights to the image using Copic markers and a fine tip marker. I placed the image on the new Scallop Caddy Box by Jaded Blossom which was cut out using my Cuttlebug. I also added some grass from the Spring Dies set by Jaded Blossom. A twine bow and some Doodlebug sequins finished my little treat box.

Don't forget the PCW October challenge and be sure to visit PCW's Facebook page.

Friday, October 16, 2015
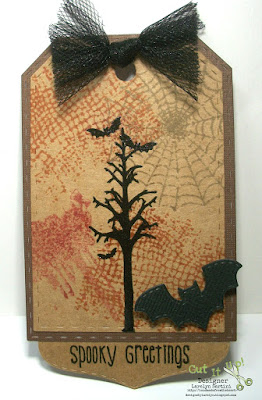
Spooky Greetings
Tuesday, October 13, 2015
Clear it Out Challenge #96

Monday, October 12, 2015
Pumpkins and Leaves

Sunday, October 11, 2015
Hostess Monday at Digital Delights
The card is a 5 x 7. I used my Silhouette to cut out all the pieces which I then inked and added some doodling here and there. Some ribbon and gems and I have a cute Halloween card.
One thing I've learned when importing SVG files is that the files often import with the pieces already separated - easier to lay out on the virtual mat especially if you want to cut by color. But then I wonder how all the pieces go together once they are cut. So, a little trick I use is to copy the colored image from the store and then drop it in my open Silhouette design. That way I have a picture reference right in front of me as I work. When I save the file to my Silhouette library, I have the picture reference included with the saved file - easy peasy.
So glad you stopped by today.
Wednesday, October 7, 2015
Digital Delights New Release
I've used Copic markers to color and papers from Authentique. A little chalk ink, a ribbon and bow, and a few Stickles and another Christmas card is complete - woohoo!
Stop by the design team blog to see the entire release.
Must.Have.Coffee.
Hi Crafty Friends
It's my design team day at Digi My World.
Today I'm sharing another image from the Kawaii Coffee set. This is such a fun set with so many options.
Today I'm sharing another image from the Kawaii Coffee set. This is such a fun set with so many options.
Isn't this a fun little treat box filled with Werther's Coffee Caramels?
It would be fun to slip in a coffee gift card too.
Along with the Kawaii Coffee set I also used:
Border Dies, Dimensional Banner Dies, Java Time stamp set and a Gable Box.
Also, Copic Markers and Glossy Accents.
Friday, October 2, 2015
Cut It Up #81 ~ Back to Nature
First I stamped the background (mat cut out with Jaded Blossom's card mat dies) using stamps from Jaded Blossom's Autumn Leaves. I stamped with Distress inks and then heat embossing with clear embossing powder so the leaves would show up on the dark background. Then I added the die cut trees from Impression Obsession. The ground was made using a die from Jaded Blossom's Tropical dies. The sentiment is from Jaded Blossom's Harvest signs stamped and heat embossed on the sign post die from Jaded Blossom's Fall Die set. A little inking, some twine and sequins and there you have it.
I hope you'll join Cut it Up Challenge #81.
This challenge is sponsored by As Cute As A Button.
They're offering a #20 gift certificate.
Subscribe to:
Posts (Atom)


